
 If your RV is looking a bit drab, it might be time for a new look. Unfortunately, we can’t all go out and purchase a new motorhome or trailer on a whim, meaning those of us with shallow pockets and light wallets have to get creative.
Luckily there is paint. By adding some color to the walls and cabinets in your tiny home on wheels, you can easily transform the space into a lovely haven. In fact, we’d even go so far as to say that painting is the very best thing you can do to make an older RV look fresh and new.
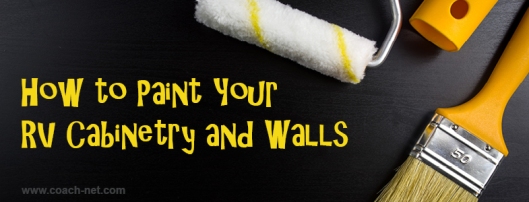
Here are our tips for taking on an RV interior painting project.
Choose Colors Wisely
 Begin by picking your colors. If you will only be painting one small space, you’ll need to think about matching or coordinating with the rest of your home-on-wheels. For instance, you may want to steer clear of colors that clash with the ceiling unless you want to paint that too.
Additionally, when choosing your color scheme, you’ll want to keep the size of the space in mind. Generally speaking, it’s best to stick to brighter, lighter colors in small spaces, steering clear of super dark tones.
Clear the Way
If you can, remove some or all of your furniture. While this might seem like a lot of work—especially if you don’t plan on replacing any of your pieces—it will save you a lot of effort down the line. It may also remove the need to become a contortionist during the painting process.
Sand Away
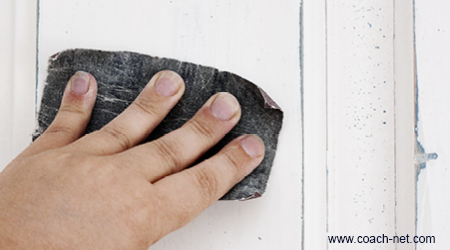 Because RV walls and cabinets are super slick and shiny, you will want to give them a rougher texture before attempting to get paint and the like to stick to them. To do this, simply sand everything you plan to paint with medium-grit sandpaper. This will leave all surfaces feeling a bit rough and ready for a coat of paint.
Wipe Well
After sanding, everything will need to be wiped down with some sort of grease-eliminating cleaner. Rubbing alcohol works well for this. However, it can cause quite the stink, so be ready to open windows and turn on the vent fan.
Get Tape-Happy
The next step is to tape. Tape all corners and meeting points on walls—more specifically, anywhere different-colored surfaces come together—with painters tape. Don’t skimp on the tape here. In fact, use more than you think you need and then add another strip. It’s worth it, in the end, to not have to do touch-up work.
Use the Right Primer
 Before you actually paint anything, you will need to prime. This will help ensure the paint actually sticks, something that is extra important on those slippery RV surfaces.
The product generally regarded as the best for this purpose is Glidden Gripper Primer. This stuff sticks to everything, and it doesn’t come off. You’ll have to be extra careful about where you drip, but thankfully your paint will be left with a nice, chip-free surface to cover.
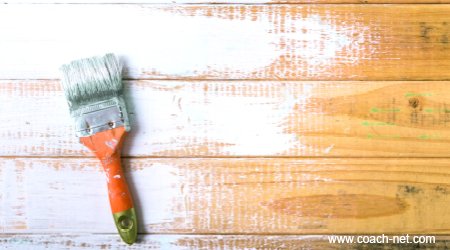
Roll on the Paint
Finally, you can get to the actual painting part of the process. In reality, painting is the easiest step, and the prep work is what takes the most time and effort.
Any interior paint you like will work just fine for this step. That said, many people prefer to use semi-gloss paints for cabinets to create a slightly shiny end result. Additionally, it is important to note that a paint pre-mixed with primer is not necessary since you will be priming with a separate product.
As far as rollers and brushes go, we recommend using foam ones. This will give you a smooth, stroke-free look, something that is especially important when painting cabinetry.
We hope this guide helps those of you who are looking to update an older RV. Now get out there, pick up your supplies, and get painting. You’ll be glad you did!
About the Author:
Chelsea has the amazing opportunity to take part in full-time RV living and traveling with her tiny tribe. She homeschools her five-year-old son as they travel, and takes full advantage of their unique situation by using the entire world as her son’s classroom. A group of total Disney fanatics, Chelsea and her family often find themselves in the Orlando area in order to visit the Disney parks, but they have also visited over 25 of the 50 states with plans to see many more along the way. No matter where her travels take her, Chelsea enjoys riding bikes, gazing at beautiful sunsets, finding new coffee shops, Irish dancing, and sitting around a campfire with her family.
You can join her adventures through her blog, Wonder Wherever We Wander.


Adam H. ~“We had a tire blowout. I want to thank the staff at Coach-Net for their quick response in finding an excellent tire shop with the correct size and brand very quickly. Communication with Coach-Net, the tire shop and us was excellent. A bad day turned out pretty well as we were back on the road very quickly thanks to your help!”

I’d like to put tile in the galley area but there is some sort of textured paper there. Not sure how hard it would be to remove. Does anyone know if you can tile right over it?
LikeLike
This was super helpful!! Thank you for providing it and I’m going to do it step by step just as you said 🙂
LikeLike