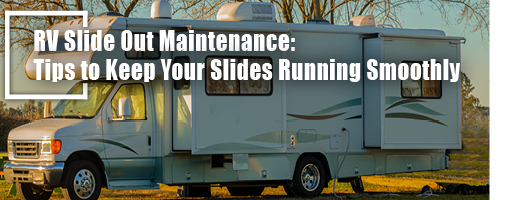
RV slide outs are a pretty awesome thing. The way they increase living space is incredible, and they’re especially appreciated by full-timers who spend all of their time in their RVs.
That said, when we got our first RV, I actually searched specifically for one without slide outs. This is because I kept hearing horror stories of malfunctioning slides and didn’t want to deal with those issues. When we got a second RV and it had a slide out, we were very careful to take good care of it and ended up falling in love.
As of this writing, my position is that I’ll never again buy an RV without a slide out, but I’ll also never neglect RV slide out maintenance. Here’s what you need to know to keep your slides in tip-top shape.
Lubrication and Cleaning
The first thing you need to know about RV slide outs? The moving parts really need to be kept clean and free of debris. They should also be lubricated regularly in order to keep running smoothly. Fortunately, it’s easy enough to head under the slide with a washcloth, wipe everything down, and add some silicone lubricant. I recommend doing this about once a month.
Caring for Slide Out Seals
The seals of your slide outs also need some care and attention. These are the things that keep water from entering the slide, meaning they protect your rig from water damage—something that is not easy to fix.
Make sure to check your slide out seals regularly, looking out for cracks, missing pieces, melted bits, etc. If you see damage, replace the seals right away. I was able to do this all on my own, so it’s definitely a DIY project.
You can protect your rubber slide out seals using a slide out seal conditioning product. This will help prevent the aforementioned cracking and breaking, meaning the seals will last longer.
Slide Out Operation Best Practices
Check First
Always, always check outside before extending a slide out. We’ve never had a slide run into anything, but we’ve seen plenty of campers run their slides into trees, poles, and other obstructions.
Likewise, you will want to check before pulling the slide in. Make sure nothing is caught under the slide, as this can damage your floor. Also make sure there is no debris on top of the slide, which can cause problems as the slide comes in. Slide out toppers can help with this.
Avoid Heavy Loads and Uneven Ground
One of the biggest issues we ever had with a slide out occurred when the slide got too loaded down. The excessive weight caused the slide to lean and get stuck. We were still able to help the slide along by pushing on it, but it never ran the same again. This is why you should never put too much weight in a slide out, especially when moving it in or out.
Another thing that can cause a similar issue? Extending or retracting the slide on an uneven surface. This can cause the slide out to move unevenly, leading to issues with jamming.
Store Properly
Slide outs should always be pulled in before the RV is put into storage. This helps avoid wind damage, hail damage, and leaks that could occur with the slides out. That said, you will want to return to the RV periodically to extend and retract the slides and add lubricant to the moving parts. This will ensure the slides are in good working condition when it comes time to go camping again.
RV slide outs really are a fantastic thing. Make sure you take care of yours and they will continue to offer you plenty of space to spread out while camping for years to come!
About the author: Chelsea Gonzales
Chelsea has the amazing opportunity to take part in full-time RV living and traveling with her tiny tribe. She homeschools her five-year-old son as they travel, and takes full advantage of their unique situation by using the entire world as her son’s classroom. A group of total Disney fanatics, Chelsea and her family often find themselves in the Orlando area in order to visit the Disney parks, but they have also visited over 25 of the 50 states with plans to see many more along the way. No matter where her travels take her, Chelsea enjoys riding bikes, gazing at beautiful sunsets, finding new coffee shops, Irish dancing, and sitting around a campfire with her family.
You can join her adventures through her blog, Wonder Wherever We Wander.
We’ve spent the past several months in Oklahoma. This has been great except for one thing; tornados and RVs don’t mix well. In fact, an RV is one of the most dangerous places a person can be when a tornado hits. So far, we’ve been fortunate enough that a tornado has never touched down where we were parked, but we have had some middle-of-the-night tornado warnings.
If you’re planning an RV trip during tornado season, you may be wondering how to prepare. Here’s what we have learned.
When and Where Do Tornadoes Strike?
First, it’s important to note that during most of the year and in most locations, tornadoes are not really all that likely. That said, in states like Texas, Oklahoma, and Kansas, the risk of a tornado touching down increases significantly during the months of April and May.
For this reason, it’s best to avoid planning RV trips through Tornado Alley during the springtime if at all possible. If this isn’t possible, read on to learn what you need to know to stay safe.
Safety Tips and Planning Ahead
Okay, so you can’t avoid spending time in a Tornado Alley state during tornado season. Here are my top tips for staying safe while camping in tornado-prone areas.
Pack a Bug-Out Bag
First, I highly recommend packing a “bug out” bag that you can grab on your way out the door if you need to seek shelter. This should include important documents, a weather radio, an external phone battery, medications you may need, snacks and bottled water, a first aid kit, a flashlight, and anything else you may need. Keep the bag by the door at all times.
Locate Shelters
While planning your trip, look for campgrounds with tornado shelters. When you arrive at a new campground, locate the shelters so you know exactly where you’re going if the sirens go off.
Learn the Difference Between a Watch and a Warning
It’s important to understand the difference between a tornado watch and a tornado warning.
Basically, a watch means the conditions are right for a tornado, but there is not currently a tornado in the area.
A warning means a tornado has been spotted in the area and you should seek shelter immediately. If the sirens go off outside or you get an emergency alert on your phone, a warning has been issued for your area.
Pay Attention to the Weather Forecast
It’s important to 1) keep an eye on the weather because it can change quickly, 2) download several weather apps and allow push notifications on each one so you are alerted of watches and warnings, and 3) allow emergency alerts from your phone.
Have an Evacuation Plan
Talk to your family about your tornado evacuation plan. Make sure everyone knows to put on shoes and grab their phones on the way out the door, and ensure each member of your party knows where the shelter is.
What to Do During a Tornado
If the tornado sirens or phone alerts go off, that means it’s time to head to the shelter. Grab your shoes, phone, and bug-out bag and go.
If you’re driving when this happens, avoid parking under an overpass, as this can actually create a wind tunnel that is incredibly dangerous. Instead, park at the nearest sturdy structure and run inside, putting as many walls as possible between yourself and the outside. If no buildings are around, pull over, get out of the vehicle, and lay flat in a ditch.
After the Storm
Once the storm passes, put on your shoes and carefully exit the shelter, watching out for debris that could be dangerous. Ensure everyone in the area is safe and call 911 if there are injuries. Check your RV for damage, take dated photos of any damage you find, and report the incident to your insurance company.
Balancing Safety with Adventure
While RVing in tornado-prone areas during the spring isn’t ideal, it is possible to do so safely. Make sure you use the steps above to prepare, stay weather-aware, and go out there and have fun!
About the author: Chelsea Gonzales
Chelsea has the amazing opportunity to take part in full-time RV living and traveling with her tiny tribe. She homeschools her five-year-old son as they travel, and takes full advantage of their unique situation by using the entire world as her son’s classroom. A group of total Disney fanatics, Chelsea and her family often find themselves in the Orlando area in order to visit the Disney parks, but they have also visited over 25 of the 50 states with plans to see many more along the way. No matter where her travels take her, Chelsea enjoys riding bikes, gazing at beautiful sunsets, finding new coffee shops, Irish dancing, and sitting around a campfire with her family.
You can join her adventures through her blog, Wonder Wherever We Wander.
One of the most difficult things to do as a full-time RVer? Balancing work with travel and fun. After all, there’s only so much time in a day, and sometimes it can be difficult to make sure you’re getting out and exploring what you came to see while also staying on top of work, chores, and other day-to-day tasks.
The good news? It is possible to do this. Here are some excellent tricks I’ve learned over the years that really help me balance work and my RV lifestyle.
Stay in Each Place Longer
The first and most important tip in this article is to simply stay longer in each place you visit. Yes, it can be tempting to hop quickly from one place to another when your home literally has wheels, but this means you have to try to squeeze all the sightseeing in each location into a small amount of time, leaving no time for work or day-to-day life.
Instead, we like to stay at least two or three weeks in one spot, giving ourselves time to do all of the usual stuff in between sightseeing sessions.
If we absolutely can’t stay in a certain spot for this long, we will plan a long stint in a less exciting place on either end of the short stint. This allows us to get work and chores done in the boring location before heading to the short stay, so we can spend all of our time seeing the attractions during the shorter stay. Heading to a less-exciting location afterwards gives us the catch-up time we may need.
Get Up Early
Getting up early to get work done before the kids wake up is an excellent way to ensure your work gets done while still giving yourself time to go exploring. I’ve met lots of families who use this method, and many of them are finished with work by noon, meaning they have the entire afternoon to explore.
Unfortunately, my husband and I are NOT morning people, so this method doesn’t work for us. What has worked better for us is staying up late instead. I’ll stay up after the kids have gone to bed and accomplish as much as I can without distractions from them. This gives us the morning and early afternoon to explore the next day.
Plan Work-Heavy Days
Work-heavy days are the method that is working well for us right now. This involves doing all of my work in 3–4 days each week, so we have the rest of the week as fun days, during which we can just play and enjoy our free time.
This does require me to be really focused during my work days, but it is doable, especially because my husband is able to focus on things like schoolwork with the kids and household chores while I work, so everything is caught up by the time our fun days roll around.
Work Efficiently
Obviously, the less time you spend working, the more time you’ll have to get out and explore. This is why finding ways to make your work as efficient as possible is a must. For me, this often involves heading to a coffee shop to work, as I am much better able to focus when I’m out of my own home and away from my kids. That said, some people find that setting up an RV office or heading out to a Clam tent to work does the same thing for them.
Other ideas for making your work as efficient as possible include:
Keeping a detailed planner so you know exactly what needs to be done on a given day.
Invest in a good internet connection. This might mean splurging on Starlink or buying multiple hotspots and a cell booster.
Automating or delegating mindless, repetitive tasks.
Using the Pomodoro Technique (25 minutes on, 5-minute break) to maintain focus.
Batching similar work together.
Avoiding time-consuming meetings that could be handled via email.
Set Boundaries
No matter when you decide to work, make those your work hours and make it clear that you will not be working outside of those hours. Don’t answer emails or do any small tasks while on outings. Instead, make your family time completely work-free. This will ensure you are spending quality time exploring with your family, and it may even help make your work time more focused.
Create a Family Calendar
Last but not least, I have to recommend creating a family calendar. Write work hours, school time, chores, outings, and classes on a calendar and keep that calendar in a place where everyone will see it regularly. This will help keep the whole family on the same page.
Balancing RV life with on-the-road work can be difficult. Even after a decade of doing it, I still find myself having trouble with it from time to time. Fortunately, the tricks above always help me get back on track quickly and I imagine they’ll help you too.
About the author: Chelsea Gonzales
Chelsea has the amazing opportunity to take part in full-time RV living and traveling with her tiny tribe. She homeschools her five-year-old son as they travel, and takes full advantage of their unique situation by using the entire world as her son’s classroom. A group of total Disney fanatics, Chelsea and her family often find themselves in the Orlando area in order to visit the Disney parks, but they have also visited over 25 of the 50 states with plans to see many more along the way. No matter where her travels take her, Chelsea enjoys riding bikes, gazing at beautiful sunsets, finding new coffee shops, Irish dancing, and sitting around a campfire with her family.
Recently, we noticed our RV water heater was leaking. This was, of course, incredibly unfortunate. I was super nervous to try to replace it, but we did figure it out with some help from friends. Here’s what we learned along the way…
Diagnose the Problem
My first (and possibly most important) tip is to properly diagnose the problem before fully diving in. We realized after we had already ordered a new water heater and pulled the old one out that our leak was likely just a fitting that could easily be replaced.
Even with that being the case, we were only with those friends for a short period of time and I didn’t want to risk the old water heater leaking again and being stuck without help, so we did go ahead and install the new one and made sure all the fittings were high quality and fastened tightly.
That said, I highly recommend finding the actual problem before ordering anything. It might just save you hundreds.
Choose the Right RV Water Heater Type
When I started shopping for a new water heater, I realized I had lots of options in terms of replacements. Looking through these and learning about each took time. Here’s what I found out.
Propane Tank Water Heater
This is what we had originally and what we decided to stick with. We like that the propane tank heater is good for boondocking and allows us to both carry a bit more water and avoid wasting water while waiting for hot H2O to come through the lines. That said, these traditional tank heaters are a bit more expensive than other options and are also heavier.
Propane and Electric Tank Water Heater
We also had the option of buying a tank water heater that had an electric heating element in addition to propane heating. This would be nice to have, but ultimately we decided it wasn’t worth the extra cost and installation hassle (i.e. wiring up a new control panel that includes an electric heater switch).
RV Tankless Water Heater
Tankless RV water heaters are all the rage right now. They are pretty cool because they heat water on demand, meaning you never run out of hot water. They are also relatively lightweight.
They heat water using propane, which would lead you to believe that they are good for boondocking. Unfortunately, as of now, that isn’t the case. They take several seconds to heat up water once kicked on, meaning you have to run water down the drain as you wait for it to get warm at the tap.
We also hear that some campgrounds do not provide sufficient water pressure for the heater to even kick, meaning some RVers are using their pumps all the time in order to have hot water.
Under-the-Sink Mini Electric Water Heater
I really wanted this option to work because these under-the-sink water heaters are so much cheaper than their RV-specific counterparts. They are also plug-and-play, meaning I could have installed one by myself without ever even removing the old water heater.
Unfortunately, these little water heaters use electricity to heat water, and they use a lot of it. This means you can’t run much else on the electric system when using your water heater in your RV. It also means it won’t really work for boondocking.
After debating all these options, I ended up ordering a direct replacement for my propane tank heater. However, I can definitely see how a different option might work better for you, depending on your situation and needs.
Check the Fit
Make sure the heater you buy will fit in the space you have. We chose a direct replacement so we wouldn’t have issues with this. That said, we did have to hunt around a little because our original water heater was an Atwood model, and Atwood no longer makes water heaters.
We found out that Suburban now makes a direct replacement, and it did seem to be almost identical to the old one.
Removing the Old Water Heater
Removing the old water heater was straightforward enough. Here’s what we had to do:
Disconnect and turn off all water and power sources, including the shore power, batteries, city water, and water pump.
Bypass the water heater and empty the water heater by pulling the plug on the front.
Disconnect the water lines to and from the heater and snip the electrical wires to the heater.
Remove the door on the front of the heater and remove the screws on the front of the water heater.
Pry the door frame from the sealant holding it in place and pull the heater out.
Make sure you have a towel on hand, as there is likely to be water in the lines. You’ll also want to make time for (gently!) scraping old sealant away from the side of the trailer. It does need to be removed so the new water heater can go in properly.
Installing the New Water Heater
Because we purchased a direct replacement water heater, installation was pretty easy:
Apply butyl tape to the wall around the outside of the water heater opening, then push the heater into place.
Connect the water lines going to and from the tank and connect the wires using wire nuts.
Screw the frame into place.
Apply silicone sealant around the frame.
Replace the door.
Double up on butyl tape in gaps if the walls of your RV are not smooth. It’s also important that you connect all wires correctly, so make sure you know what you’re doing. Once the water heater is installed, make sure to fill it and watch for leaks.
If leaks do appear, it may be that you’ll need to reroute the nearby water lines a bit to relieve tension. We found that the fittings on the new heater were ever so slightly shifted from the old ones, and our lines were too rigid to handle the change without some modification.
Once you’re sure the heater is water-tight, turn it on and wait to see if the water heats properly. If it’s on propane, ensure that the flame is a nice, healthy blue.
Congratulations! You just replaced your RV’s water heater like a pro.
About the author: Chelsea Gonzales
Chelsea has the amazing opportunity to take part in full-time RV living and traveling with her tiny tribe. She homeschools her five-year-old son as they travel, and takes full advantage of their unique situation by using the entire world as her son’s classroom. A group of total Disney fanatics, Chelsea and her family often find themselves in the Orlando area in order to visit the Disney parks, but they have also visited over 25 of the 50 states with plans to see many more along the way. No matter where her travels take her, Chelsea enjoys riding bikes, gazing at beautiful sunsets, finding new coffee shops, Irish dancing, and sitting around a campfire with her family.
It’s finally time to pull the travel trailer out of storage and get back out on the road to enjoy some camping! That said, you will want to make sure to take care of some basic maintenance tasks before you head out.
Not sure what kinds of maintenance tasks you need to be doing? You’ve come to the right place! In this article, I will discuss all of the most important trailer maintenance tasks that my husband and I try to make a point of staying on top of.
Resealing the Seams and Roof
Easily the most important travel trailer maintenance task there is, resealing the seams and roof of your trailer is a must-do at least every 12 months. This is so, so important because those seals are what keeps water out of your RV walls and roof. Water damage happens quickly and is difficult and expensive to fix. Fortunately, resealing is relatively easy.
To reseal the seams on the roof and sides of your trailer:
Clean each seal to remove dirt and loose bits.
Apply RV sealant over each seam, making sure to cover the entire seam.
Allow to cure.
Slide Maintenance
You’ll also want to take good care of your slides. Make sure to lubricate the slide mechanisms every couple of months. It’s also a good idea to keep an eye on the slide seals. These rubber pieces wear out over time, but replacing them is as simple as sliding them out of place and sliding a new set in.
Maintaining the Water System
Your RV water system does need a bit of maintenance from time to time as well. For one thing, it is super important that you winterize the system before the first freeze of the year. Replacing the anode rod in your water heater (if it has one) is also a must-do. Additionally, you’ll want to use a back-spray tool to clean the waste tanks after each trip and clean the fresh tank and lines once a year.
To clean the fresh system:
Pour a bleach-and-water mixture (¼ cup bleach to 15 gallons of water) into the tank.
Pump it through the lines using the RV water pump.
Allow it to sit for 12–24 hours.
Drain the system completely.
Add clean water to the tank.
Run it through the system.
Drain it all again.
Checking the Tires
Your RV tires are crucial. Without them you aren’t going anywhere, and if one happens to give out while you’re on the highway, it can be incredibly dangerous.
Check tires before every trip, looking for cracks, bubbles, etc.
Install a trailer TPMS (tire pressure monitoring system).
Replace tires at least every six years.
Use tire covers when parked for long periods of time.
Greasing the Wheel Bearings
Many trailer owners are not aware that they should be greasing the wheel bearings once a year. Now, I’ll be honest and say I’ve never done this particular job myself, because we always take it into a shop to have it done. That said, we have friends who do the job on their own and they don’t seem to have an issue.
The video below explains the process:
Brake Maintenance
Last but not least, I have to mention brake maintenance, which is very important for obvious reasons.
Inspect the brake pads, rotors, and drums for issues at least once a year, replacing worn parts as needed.
Test the brakes before hitting the road each trip. If they don’t engage properly, skip the outing and address the problem first.
If your trailer has hydraulic brakes, look at the brake fluid before each trip and top it off as needed.
As you can see, owning a travel trailer does require quite a bit of maintenance work. That said, we find that it’s totally worth the freedom that comes along with it! I think you’ll probably agree.
About the author: Chelsea Gonzales
Chelsea has the amazing opportunity to take part in full-time RV living and traveling with her tiny tribe. She homeschools her five-year-old son as they travel, and takes full advantage of their unique situation by using the entire world as her son’s classroom. A group of total Disney fanatics, Chelsea and her family often find themselves in the Orlando area in order to visit the Disney parks, but they have also visited over 25 of the 50 states with plans to see many more along the way. No matter where her travels take her, Chelsea enjoys riding bikes, gazing at beautiful sunsets, finding new coffee shops, Irish dancing, and sitting around a campfire with her family.
You can join her adventures through her blog, Wonder Wherever We Wander.
It is important to periodically check your RV’s tire tread looking for unusual wear patterns. Your tires are one of the most critical safety components in your RV, and their condition can directly impact your handling, fuel efficiency, and overall safety on the road. Unlike passenger cars, RVs often carry heavy loads for extended periods, which puts extra stress on the tires. Ignoring subtle signs of wear could lead to blowouts, alignment issues, or even costly repairs down the line. By regularly inspecting your tire tread and being aware of common wear patterns, you can prevent problems before they occur and keep your RV in top-roadworthy condition. Below is an image I created to help identify types of wear patterns to watch for:
Tire Wear Patterns
Center Wear
This is typically caused by overinflation which creates a rounded tread pattern and excessive heat on the center which wears the tread faster. It is important to check the pressure of your tires every time you hit the road. This should be done at the beginning of the trip when the tires are considered cold or at ambient temperature. To fix this, check the inflation of your tire and reduce the pressure to the recommended PSI which should be listed on the data label of the trailer.
Outside Wear
This is typically caused by an underinflation tire which flattens the tread and creates a reverse curve causing the outside of the tread to wear faster. Check your tire pressure before every trip and adjust according to the recommended PSI. This condition can also be caused by overloading the RV. It is important to weigh your rig on a CAT Scale to ensure that you are not over the Gross Vehicle Weight Rating (GVWR).
Inner Wear
If the inside tread is wearing faster than the rest of your tire it is typically due to an overloaded situation that puts excess weight on the axle and creates a loss of camber or simply put, a bent axle or spindle. It is important to check the weight of your RV to ensure it is not over GVWR and reduce weight if needed. The only fix for this situation is typically an axle replacement.
Outer Wear
This wear pattern is caused by excess camber which could be a bent spindle, damaged axle, or improper axle installation. This typically requires a laser alignment inspection and spindle replacement.
Periodic Inspection
It is a good idea to periodically inspect the tread of all your tires looking for excessive wear, bulges, cracks, or other imperfections that could cause premature tire wear and even a blowout. Rub your hand across the face of the tread back and forth. If you feel a rough or “feathered” tread in one direction and smooth in the other, this is an early sign of misalignment. Getting it checked by a quality service center will prevent tire issues in the future.
Cupping and Flat Spots
A flat spot on the tire tread is typically caused by over-aggressive braking and usually means the auxiliary trailer brake is set too high for the weight of the trailer. The trailer brake is designed to simply slow the momentum of the weight of the trailer, not stop it or the tow vehicle in case of brake failure. One of my drivers always had the trailer brakes set to maximum as he liked the feel of the pull when braking. His tires always came back from a trip almost square! Have your auxiliary braking system set according to the trailer weight.
Cupping can be caused by unbalanced tires, improper seated bearings, or improper weight distribution. If the tongue weight is too high or too low, you will experience highway hopping or porpoising which can be corrected by having the tongue weight checked and corrected. Some tire centers do not balance trailer tires as they do not feel it is necessary, however, I have always felt it was important to verify not only the tire but the rim is running down the road in good condition.
When Is It Time To Replace A Tire?
There are several conditions that would require a tire to be replaced starting with age. There is quite a debate regarding how long a tire should be kept in service and typically one will blow out long before it gets too old. All tires have a date stamped on the side of the tire. It starts with DOT and the last four digits are the week and year of the tire. In this case, the tire was manufactured in the third week of 2016.
For many years, tire manufacturers have recommended replacing a tire after it is 7 years old, then switching to 10 years due to newer technology. However, today most tire manufacturers do not have an age recommendation but rather a suggestion to inspect the tire and replace it if there are imperfections or excessive tire wear. Most tire experts recommend replacement after 7 years.
Another issue is tread wear as indicated earlier. Excessive and uneven tread wear should be addressed and tires should be replaced accordingly. The Department Of Transportation (DOT) has a minimum tread depth of 4/32” on steer tires and 2/32” on all others. Check your tire depth with a quality depth gauge as part of your pre-departure checklist.
About the author:Dave Solberg: Managing Editor, RV Repair Club
For the last 25 years, Dave has conducted RV maintenance and safety seminars, developed dealer and owner training programs, written RV safety and handyman articles, authored an RV handbook reference guide and logged over 100,000 miles on the road in an RV.
RV Repair Club is your go-to online resource for enthusiasts who want quality RV maintenance, repair, and upgrade information – a community where passionate RVers can come together to gather knowledge and share their experiences.
We want to switch from our current travel trailer back to a motorhome. The thing is, I’m having a really hard time finding a bunkhouse class C motorhome in our price range. This means I’m probably going to have to get creative when it comes to making sure everyone in my family has their own dedicated sleeping space in whatever rig we buy.
The good news? There are ways to add RV beds to a motorhome or trailer. Here are a few of the best ideas I’ve seen.
Convertible RV Furniture
The first, easiest, and most obvious option is, of course, to use the existing furniture to create extra sleeping spaces. The vast majority of RVs come with a dinette and/or couch that can turn into a bed. It’s totally possible to switch one of these to bed mode and leave it that way as a dedicated sleeping space.
You can even add a real mattress or a mattress topper to make this sleeping situation more comfy. Just keep in mind that doing so will mean giving up a couch or table in exchange for a bed.
Disc-O-Bed
If you don’t want to give up any of your seating but still want to have a bed for your kid, you’ll need to find a way to fit a bed into an empty space. Unfortunately, empty spaces are hard to come by in an RV. Most are tiny, and some go away once you pull the slides in. This is where the Disc-O-Bed comes into play.
Disco-O-Bed is a small, collapsible bunk bed cot that is perfect for young kids. It’s smaller than any other bed we’ve found, meaning it fits in tight spaces. And because it can collapse, it’s easy to put it away on travel days when the slides need to come in.
Of course, it’s also nice that you can sleep two kids in a space that would normally only accommodate one.
Rollaway Bed
One option that I’ve looked into for my 5-year-old daughter is a rollaway bed. The idea is that we would remove the dinette (so we are still giving up the table) and put the rollaway in that space.
The benefit to doing this is that A) she gets a real bed, and B) it can be folded in half and rolled against a wall, giving us a good amount of open floor space when we need it. This is especially nice for us because I need a good amount of floor space in order to teach my online dance lessons.
Cabbunk
If you’re looking to add beds to a van or class C, you might consider a Cabbunk. A bit like a hammock or a cot, Cabbunk is awesome because it adds sleeping spaces to the cab of your RV, a space that is pretty much wasted while parked anyway.
Cabbunk can be installed without making any major modifications to the rig, and it can be put up and taken down quickly, so travel day isn’t a pain. The bed setup is also lightweight, making it easy to carry along, and the beds are supposedly surprisingly comfortable.
Luno Bed
Another option for a van is the Luno Bed. This is an inflatable bed that is custom-made to fit in the front of a campervan (though I’m betting you could also make it work in a class C). It fits across the two front seats and even leaves space for the steering wheel.
I could see it being annoying to set up and take down every time you drive, but if you’re willing to do that, it seems like a good solution. Just make sure you have some window covers for the windshield and front windows.
Custom Setup
Last but not least, there is the option of building a custom RV bed setup. For some, this means expanding the master bed to create a king-size bed and giving that to the kids to share. For others, it means building custom bunk beds that fit perfectly into whatever nook you can come up with. Get creative and see what you can come up with!
Note: It is possible to cut foam mattresses to size, so if you need to make your custom bed an odd size, you should be able to create a mattress that fits.
As you can see, we have a lot of options for adding RV beds to whatever motorhome we end up buying. Do you need to add RV beds to your setup? Which option will you use?
About the author: Chelsea Gonzales
Chelsea has the amazing opportunity to take part in full-time RV living and traveling with her tiny tribe. She homeschools her five-year-old son as they travel, and takes full advantage of their unique situation by using the entire world as her son’s classroom. A group of total Disney fanatics, Chelsea and her family often find themselves in the Orlando area in order to visit the Disney parks, but they have also visited over 25 of the 50 states with plans to see many more along the way. No matter where her travels take her, Chelsea enjoys riding bikes, gazing at beautiful sunsets, finding new coffee shops, Irish dancing, and sitting around a campfire with her family.
When our son was younger, we would make a point of visiting children’s museums wherever we went. Now that our daughter is old enough to appreciate these museums, they are making their way back into our travel plans.
In this article, we will discuss the best children’s museums we’ve seen so far. Choose one from this list when planning your travels, and you really can’t go wrong!
The Magic House
St. Louis, MO
St. Louis is home to a number of great attractions. There is a free zoo that is amazing, as well as a free science center, a history museum, and an art museum. The city is also home to the incredible City Museum, which should be on every traveler’s must-see list. Another favorite St. Louis spot of ours? The Magic House.
I have fond memories of visiting the Magic House when I was little, and was pleasantly surprised to find that the museum met my expectations all these years later. The place plays host to climbing structures, sand- and water-play areas, an outdoor play area, and the crown jewel: a kid-sized city where kids can try out different occupations for a while.
Houston Children’s Museum
Houston, TX
Houston is another city with lots of wonderful museums to choose from. The Health Museum is fantastic, as is the Houston Museum of Natural Science. Of course, you definitely don’t want to miss the Houston Space Center, nor do you want to skip the amazing Houston Children’s Museum.
The latter museum features one of the bigger kid cities I’ve seen, and the city is complete with currency, meaning kids can get “jobs” and earn “money” to go spend at the businesses in the tiny town. Other cool things in this museum include a huge outdoor play area, an awesome indoor climbing structure, and a super fun maker space where kids can create new inventions.
Children of Gettysburg
Gettysburg, PA
One of the more unique children’s museums we’ve seen, Children of Gettysburg is small, but it has a very specific purpose, and it does its job well. The purpose? To present the story of Gettysburg in a way that kids can understand and appreciate.
The museum follows a set of children from various backgrounds through the events of the Battle of Gettysburg. Everything is explained in a way that kids can connect with and digest, and there are plenty of hands-on activities to engage young visitors and help them dive into the world of the 19th-century children they are learning about.
My kids especially loved the last room where they could care for an “injured soldier” and make a speech as President Lincoln.
Bay Area Children’s Museum
San Francisco, CA
Bay Area Children’s Museum may be a lesser-known children’s museum, but we thought it was absolutely magical. In fact, we loved this museum so much that we returned for a second round of fun a couple of years after the first.
The museum is set up in several different buildings, which I appreciated, as it helped my busy little guy focus on the thing he was doing rather than being distracted by all of the other exhibits. There was a lovely outdoor space between the buildings with the coolest “natural” play area. We really loved the art room at this museum and probably could have stayed there all day long.
How to Save on Children’s Museum Visits
One of the things I don’t love about children’s museums is how expensive they can be. Fortunately, we have found some ways around that:
Many children’s museums offer free or cheap days each week or once a month. Look for these days and try to plan your travels around them if you can.
Additionally, some museums will offer coupons or Groupons. Search for these before paying full price; you never know what you might find.
Lastly, a lot of children’s museums are part of reciprocal museum programs. ASTC is a science museum reciprocal program that offers members free admission to all member museums. ACM is a children’s museum reciprocal program that offers cardholders half-off admission to the museums in their program. Both include plenty of children’s museums all across the country.
As you can see, there are lots of amazing children’s museums scattered across the country, and really, these are just a handful of them. Hopefully, this article inspires you to check out a few of these super fun spots for yourself!
About the author: Chelsea Gonzales
Chelsea has the amazing opportunity to take part in full-time RV living and traveling with her tiny tribe. She homeschools her five-year-old son as they travel, and takes full advantage of their unique situation by using the entire world as her son’s classroom. A group of total Disney fanatics, Chelsea and her family often find themselves in the Orlando area in order to visit the Disney parks, but they have also visited over 25 of the 50 states with plans to see many more along the way. No matter where her travels take her, Chelsea enjoys riding bikes, gazing at beautiful sunsets, finding new coffee shops, Irish dancing, and sitting around a campfire with her family.
Spring is almost here! For us in the upper portion of the country, our rigs have been hibernating either in a nice climate-controlled shed plugged into an electrical source or left outside in the frozen tundra , hopefully with a cover that at least keeps the mountains of snow from melting and trying to sneak into the rig.
We’ve posted articles regarding de-winterizing and exterior maintenance, however, there have been some new materials that have been introduced in the RV industry as well as some new products that will help with maintenance. Here is a list of what I feel are the main items that need to be addressed before you hit the road this summer.
1. Inspect, Clean, And Condition Your Roof
Most RV owners don’t think about the roof until they have a leak inside the rig. “Out of sight, out of mind” is pretty common, and once you see a leak inside the rig, the damage has already been done! Recently, we brought in a 1996 Forest River Salem at the RV Lifestyle and Repair Club to do some renovations, and it had a floor leak. In an RV, there are very few floor leaks rather than floor damage from a leak that started on the roof and channeled down to the floor where the damage was actually visible.
It is important to inspect the roof material for pinholes, cracks, or cuts and tears that would allow moisture to penetrate. Rubber membrane materials such as EPDM, TPO, Alpha System,s and others recommend cleaning with a mild detergent and conditioning depending on the material. Check with your specific material manufacturer.
The most important maintenance you can do in my opinion, is to check the sealant at the roof to the sidewall joint, front cap, and all around anything that is attached to the roof, such as TV antenna, roof vents, sewage vents, and such. All have a self-leveling lap sealant around the edge, but this can get dried, brittle, and crack, allowing moisture to penetrate.
2. Check Your Tires
“The wheels on the bus go round and round”, but only if they are in good shape! Tires are the most critical component of an RV, but they are also the most neglected. Few owners check the pressure every time they hit the road, and most just do a visual check or the thump with a trucker’s bat! If your tires are 10 psi less than the recommended pressure, it reduces the carrying capacity by 25%! Check the sidewall for weather checking, which is cracking due to exposure to the sun, and anything over 1/8” is a failure waiting to happen. A tire may look good visually with good tread, but there are hidden dangers, such as cracking between the tread bars, inside blisters, and age. Check the DOT marking on the side, as the last 4 digits indicate the month and year the tire was made. Anything over seven years is suspected of failure due to heat and component degradation. If the tires are always covered when not in use and the pressure is checked regularly, you might get more life out of them.
3. Check Your Propane System And All Appliances For Leaks
Most RV owners take their propane systems for granted. It either works or it doesn’t, and then they start to pay attention. Spring is a good time to check the LP system for leaks, inspect the DOT Cylinders or ASME tank, and check and clean appliances.
DOT Cylinders are used on travel trailers and 5th Wheel RVs and come in 20lb, 30lb, and 40lb cylinders typically found on bigger rigs. They are typically removed and refilled at an LP filling location,n at which time they are required to inspect the cylinder for rust, damage, age, and an Overfilling Prevention Device (OPD Valve). This is a rectangular-shaped valve and limits filling to 80%.
According to the RV Safety And Education Foundation (RVSEF), DOT Cylinders were originally required to be re-certified after 12 years, then in 2017 it was changed to 10 years but went back to 12 years in 2020 so there is quite a bit of confusion especially since some of the documentation has not been updated. Also, the cylinder must be recertified every 5 years after that, but the NFPA code still shows 7! Here is a link to the article by RVSEF.
ASME tanks on motorized do not have to be recertified, just inspected for rust and damage.
The bottom line is that now is a good time to visually inspect the cylinder for dents, rust, and especially hoses and connections going to the cylinder and tanks, as the rubber can get weather-checked and cracked. If it is over 10 years old, get it recertified.
Checking for leaks can be done the old-fashioned way with a leak testing solution at every connection however, that takes a long time, and there are some new gadgets that make it simple. An LP sniffer like this one is a great tool to verify connections quickly and in a general vicinity rather than at all individual connections. You can find it online or at Home Depot.
An LP Safety product that I came across recently is Gas Stop, which is a 100% automatic shut-off in case of a major leak or regulator failure and is also great for detecting a minor leak anywhere in the system right at the dial on the tank or cylinder. It is easy to install and can also be used to determine the level of LP in the tank or cylinder. Check out the video on our site here.
4. Water Heater Prep and Sanitation
More rigs today are equipped with a six or ten-gallon 120-volt and LP water heater. When you put your rigs to bed for the winter, you drain the water lines and water heater tank and can either add RV antifreeze or blow out the lines with compressed air. In either situation, most RVers drain the water heater completely and, rather than fill the six or ten-gallon tank with RV antifreeze, opt to use the water heater bypass valve and leave the tank empty. If you have a 120-volt/LP model, it is critical that you do not operate the water heater on 120-volt power without water in the tank! It’s easy to do. You bring the unit out, plug it into shoreline power to charge the battery, and check all the appliances and the 120-volt switch for the water heater is in the outside compartment, and you don’t see it. The heating element gets cherry red and shorts out and ruins the water heater. Make sure the 120-volt switch is off or you have water in the tank.
The water heater drain plug is not at the absolute bottom of the tank, rather about 2” above, so there is typically about 2” of water sitting in the bottom of the tank. This is not an issue with freezing as there is plenty of room in the tank for expansion; however, that hard water from the campground source has calcium, rust, and lime that will sit there for several months and can get really skunky! This is a good time to use a water heater flush tool to go into the drain hole and blast out all the junk in the bottom of the tank.
This would also be a good time to sanitize the fresh water tank, lines, and water heater with either a ¼ cup of bleach in 50 gallons of water or the Thetford Fresh Water Sanitizer.
5. House Battery System
If you have flooded lead acid (FLA) batteries, hopefully, you stored them properly and did not let them drain down and freeze. This is a good time to check the fluid level and fill the breather vent in each cell with distilled water. With either FLA or Absorbed Glass Matt (AGM), pull the positive and negative cables off the battery and thoroughly clean them with a wire brush or, better yet, a battery cleaning tool. Reconnect the cables and spray with a protective spray such as CRC Battery Terminal Protector
If you have Lithium Iron Phosphate batteries, you should have pulled the negative cable, and since these don’t gas at all, there should be no corrosion. However, it is a good idea to inspect all connections and cables at this time.
And with any battery, give them a good charge at the recommended rate, voltage, and time according to the manufacturer before using them.
About the author: Dave Solberg: Managing Editor, RV Repair Club
For the last 25 years, Dave has conducted RV maintenance and safety seminars, developed dealer and owner training programs, written RV safety and handyman articles, authored an RV handbook reference guide and logged over 100,000 miles on the road in an RV.
RV Repair Club is your go-to online resource for enthusiasts who want quality RV maintenance, repair, and upgrade information – a community where passionate RVers can come together to gather knowledge and share their experiences.
Winter is in full swing, but that doesn’t mean your RV travels have to come to a stop. My family enjoys traveling all year long, and yes, we do even work outdoor destinations into our winter schedule. In this article, I will share some of the best national parks to visit in winter so you can do the same!
The Best Cold Weather National Parks to Visit in Winter
Want to embrace the winter weather and take in the icy beauty it has to offer? Head to one of these gorgeous cold weather places, which are easily some of the best national parks to visit in winter.
Yellowstone National Park
Yellowstone National Park is one of the country’s most popular parks, and for good reason. This place is absolutely gorgeous, and in the winter it becomes a magical wonderland filled with snow-covered landscapes, steaming geysers, and plenty of wildlife, including bison and wolves.
Best Things to Do
Some of the best things to do in Yellowstone in the winter months include snowcoach or snowmobile tours to attractions like Old Faithful and the Grand Canyon of the Yellowstone. Cross-country skiing and snowshoeing are also popular, along with wildlife watching in Lamar Valley.
Where to Camp
RV camping in the park itself is limited in winter. Mammoth Campground remains open year-round, so you might be able to snag a spot there, but be prepared to camp without hookups.
Otherwise, you might head to the nearby Yellowstone Grizzly RV Park in West Yellowstone, Montana. This campground stays open in winter and offers heated facilities.
Bryce Canyon National Park
I absolutely loved the bizarre hoodoos and other weird and wonderful rock formations in Bryce Canyon. These become even more strange and beautiful in winter when they are covered in snow, creating an otherworldly landscape you won’t soon forget.
Best Things to Do
Not sure what to do? Walk along the Rim Trail for breathtaking winter views. If possible, you’ll also want to attend ranger-led full-moon snowshoe hikes for a memorable experience. Cross-country skiing is also available near Fairyland Road.
Where to Camp
Inside the park, North Campground is open year-round. Sites are first-come, first-served and do not include hookups of any kind. If you do need hookups, head to Ruby’s Inn RV Park and Campground, located just outside the park entrance.
The Best Warm Weather National Parks to Visit in Winter
If you’re like me, you’d prefer to skip the winter cold altogether. In this case, you might want to consider one of these warm-weather national parks. They are the best national parks to visit in winter if you’re looking for warm temperatures and sunny skies.
Everglades National Park
We’ve visited the Everglades many times during the winter season. We love it because winter is the dry season, meaning lovely weather, fewer mosquitoes, and excellent wildlife viewing. Besides, who doesn’t love basking in the Florida sun in the wintertime?
Best Things to Do
I highly recommend taking a guided boat tour or renting a kayak to explore the mangroves and hopefully spot some manatees. It is also super fun to go birdwatching at Shark Valley or along the Anhinga Trail.
Lastly, make sure to join a ranger-led program to learn about the park’s unique ecosystem. We especially loved the nighttime tour to see the gators in action.
Where to Camp
Long Pine Key Campground and Flamingo Campground are both located inside the park and can accommodate RVs. Flamingo offers electrical hookups, while Long Pine Key has dry camping. Both fill up quickly though, so be sure to book early!
If you can’t grab a spot in the park, consider Miami Everglades RV Resort. This is a full-service option close to the park entrance and we’ve always enjoyed our stays there.
Joshua Tree National Park
Another park we’ve visited many times in winter, Joshua Tree is absolutely stunning. The mild weather during the cold months makes hiking and rock climbing more enjoyable than it might be during the heat of summer. Winter is also a quieter season, meaning fewer crowds.
Best Things to Do
While you’re in Joshua Tree, be sure to hike the Hidden Valley or Barker Dam trails, and rock climb at famous formations like Intersection Rock. It’s also a good idea to do some stargazing once the sun goes down. This is a designated International Dark Sky Park after all, and the night skies are suitably incredible!
Where to Camp
Inside the park, you will find that the Black Rock and Cottonwood campgrounds are RV-friendly, but there are no hookups to speak of, and big rigs may not fit. If you need to find a place outside of the park, you can boondock on the BLM land surrounding the park or head to an RV park such as Joshua Tree Lake RV & Campground, which offers full hookups.
Ready for a wintertime RV adventure? Choose one of the parks above, book a campsite, and get ready to see these beautiful places in all their wintery glory!
About the author: Chelsea Gonzales
Chelsea has the amazing opportunity to take part in full-time RV living and traveling with her tiny tribe. She homeschools her five-year-old son as they travel, and takes full advantage of their unique situation by using the entire world as her son’s classroom. A group of total Disney fanatics, Chelsea and her family often find themselves in the Orlando area in order to visit the Disney parks, but they have also visited over 25 of the 50 states with plans to see many more along the way. No matter where her travels take her, Chelsea enjoys riding bikes, gazing at beautiful sunsets, finding new coffee shops, Irish dancing, and sitting around a campfire with her family.